This is the season of phone calls from clients needing Eco Brooklyn’s help with their brownstone extensions. The problem is always the same: they are cold.
They call us up because we are Brooklyn brownstone insulation specialists.
Here are my observations having seen and fixed extensions for a while now.
There are two types of extensions. The first was built when the original brownstone was built and its side walls are brick like the rest of the brownstone. It is usually sitting on a thin concrete slab on earth.
The second kind of extension is one that was added on later and is usually built out of wood framing and stucco. It usually sits on a flimsy wood structure a couple inches or a foot off the ground.
Beyond those differences the Brooklyn brownstone extension suffers from the same issues, namely lack of insulation, bad design and bad weather sealing.
The extension is not protected on both sides by neighboring buildings so it has three walls where it loses heat. It is not protected above by another floor and it is not protected below by the cellar or basement. So above and below it is losing heat as well.
All in all the extension is not an energy efficient design.
The other issue is that rarely does the extension have any insulation at all! It is just one massive heat sink.
To make matters worse the brownstone usually has many little air holes all over it’s envelope, from cracks in the cellar to cracks in the brick wall near the roof.

These cracks create what is called the stack effect, where hot air rises up a stack. In this case the stack is the house itself.
Hot air escapes out of the cracks in the top floor and roof. The hatch going to the roof, the leaky air space in the attic crawlspace, the cracks in the brick walls around the chimney chute, all these are places where hot air escapes (since hot air rises).
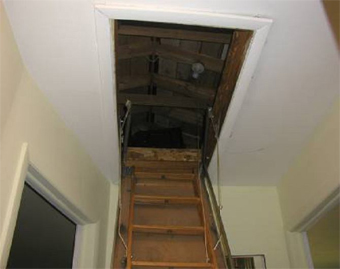
This lost air out the top of the house creates a negative pressure at the bottom of the house that pulls cold air in. The coal chute, the cracks around doors and windows, vents in the boiler room, cellar doors, these are all places where cold air gets sucked into the house.
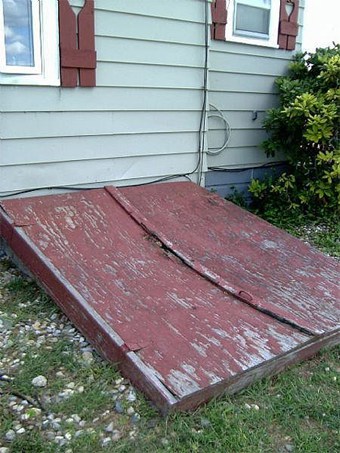
This stack effect makes the bottom of the house, especially the extension very cold.
Obviously the inhabitants on that floor raise the heat……
And that simply speeds up the process. The boiler goes on overdrive to make more heat, which rises even faster and subsequently sucks more cold air into the house faster.
Eventually the top floors get too hot and somebody opens a window. This speeds it up even more, the boiler works harder, the heat rises faster and the lower floors get colder.
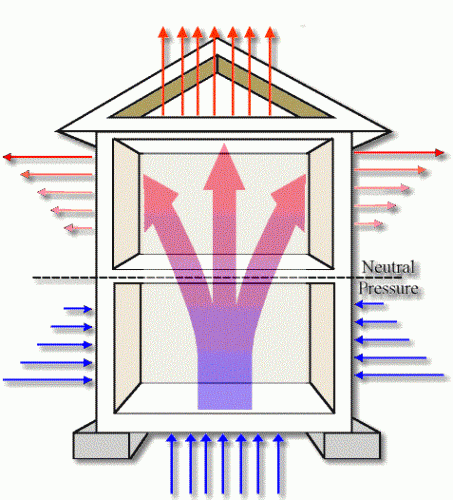
And all the while money is being wasted in fuel bills to heat the air ABOVE the building.
The solution?
Contrary to what the clients think, insulation is not the lowest hanging fruit. Sealing the leaks is the first line of action. But people often don’t even realize the house is leaking.
A trained eye or a thermal imaging camera can see the leaks easily, though. For example the image below shows the blue spots where cold is seeping into the house:
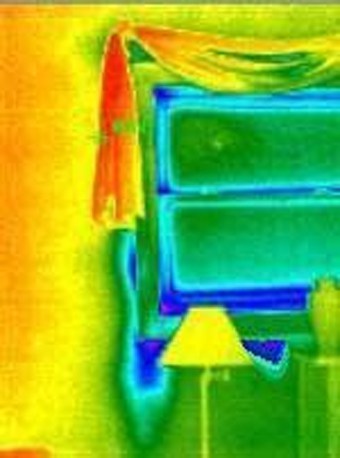
To address this issue you need to do weather sealing on the house. With caulk, foam, tape, plaster and weatherstripping, the weather sealing expert combs the house with a scientific eye in search of any place where air can move. Anyone can do this but I trust somebody who really knows what they are doing to do the job well.
Once the air movement has been stopped it is amazing how much more comfortable the house it.
The next step is to insulate the extension. Above, below and on each side it must be insulated as best as possible. In the walls and ceiling it is easy to open up holes in the sheet rock and blow in cellulose insulation.
The ground might be more difficult to solve. If there is a crawlspace then you either staple up fiberglass under the rafters or lay a vapor barrier on the earth and blow cellulose onto the barrier.
If there is no crawlspace and the floor sits on the earth then there are two solutions. One is to dig out the floor a foot, add vapor barrier, 4 or 5 inches of XEPS waterproof insulation, a concrete slab and then tiles.
Variations on the above is to put an earthen floor instead of concrete. Earthen floors can be made so they are very resistant to wear. They are more aesthetically pleasing than concrete, have a warmer more homy feel, and they can serve as the main floor instead of tiling it over.
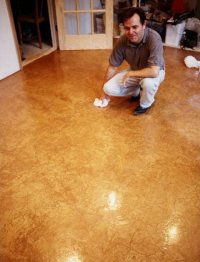
Another option is to put radiant floor heating, either in the concrete or the earthen floor.
The second alternative to digging down is to simply build on top of the existing floor. This is slightly cheaper but you can only do it if you have the head room. In this case you add a vapor barrier, insulation, stringers and plywood. You can cover the plywood with wood or tiles.
Once the house has been weathersealed and the extension has been insulated your heating bills go down and the comfort goes way up. The extension no longer feels like an ice box while the people on the top floor are sweating their butts off.
